Posted 2016/9/14
Running Harvey under minimega
So you followed the directions on Harvey’s Getting Started page, and now you have a kernel and userspace compiled. Maybe you booted the kernel using one of the Qemu scripts provided, but you’re ready to do something more complex / repeatable.
This is where minimega comes in. minimega allows you to easily, quickly, and repeatably start a bunch of VMs. In this article I’m going to show how to start a Harvey CPU server under minimega, then how to boot a terminal as well.
Although it may feel like you’re typing a lot of commands to launch the VM, at the end of the article I’ll show how you can put all the commands in a file and automatically launch them with minimega, so you can launch a full harvey virtual network with one command!
In these examples, we use the 192.168.0.0/24 network for the virtual machines. If your host machine is already on the 192.168.0.0/24 network, you’ll need to change any references to another private network, such as 192.168.1.0/24 or 10.0.0.0/24.
The first thing to do is start Harvey’s 9P file server:
$HARVEY/util/ufs -root $HARVEY
Now, go to minimega.org and get the minimega tarball. Unpack it and start minimega:
wget https://storage.googleapis.com/minimega-files/minimega-2.2.tar.bz2
tar xjvf minimega-2.2.tar.bz2
cd minimega-2.2-release
sudo ./bin/minimega
It may complain that you’re missing a few external programs. The most important ones are related to openvswitch and dnsmasq, so you may need to install your OS’s packages to get them. (On Debian and Ubuntu, the packages are called openvswitch-switch and dnsmasq)
Assuming you’re now sitting at a minimega prompt, we can set up our virtual machines. First, we configure the kernel–you’ll need to set your own path here, of course!
minimega$ vm config kernel /home/john/harvey/sys/src/9/amd64/harvey.32bit
Next, we specify that the VM will be on virtual network #100 (an arbitrary number in this situation), that it will have 512 MB of memory, and a single virtual serial port:
minimega$ vm config net 100
minimega$ vm config memory 512
minimega$ vm config serial 1
Next up, we modify a few default QEMU parameters:
minimega$ vm config qemu-override add "-cpu host" "-cpu Opteron_G1"
Then we append some kernel arguments for Harvey:
minimega$ vm config append service=cpu nobootprompt=tcp maxcores=1024 fs=192.168.0.1 auth=192.168.0.1 nvram=/boot/nvram nvrlen=512 nvroff=0 acpiirq=1
That’s it for VM configuration. Now we need to set up the host machine’s virtual network and start a dhcp server. You can choose different IP spaces for this, you want something that doesn’t conflict with existing networks. You may need to run “sudo service dnsmasq stop” at a shell prompt before launching dnsmasq.
minimega$ tap create harvey ip 192.168.0.1/24
minimega$ dnsmasq start 192.168.0.1 192.168.0.2 192.168.0.10
We also start minimega’s web interface so we can view the VMs at localhost:9001 after launching.
minimega$ web
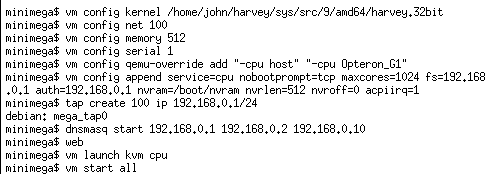
Finally, we can start a VM called “cpu”:
minimega$ vm launch kvm cpu
minimega$ vm start all
Here’s what your terminal might look like when you’re done:
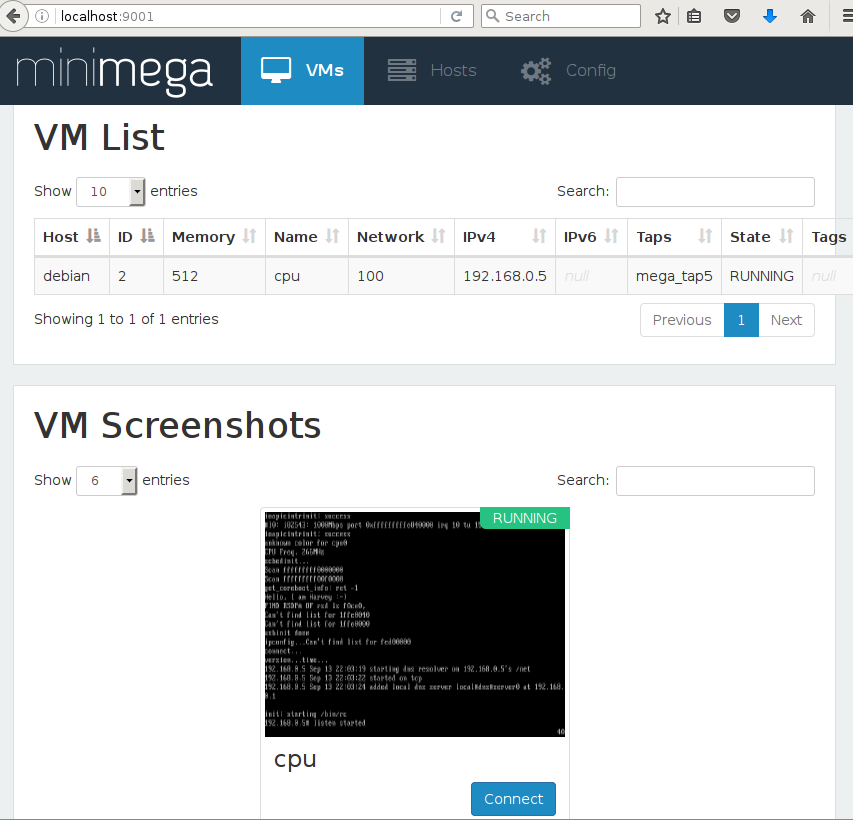
If you browse to localhost:9001 on the host machine, yo should see a screenshot of the ‘cpu’ VM. If you click “Connect”, you’ll be taken to the VM’s console where you can enter commands.
Also on the web interface you’ll see a VM list, which conveniently shows the IPv4 address that was assigned to the VM. You can use drawterm to connect to this IP for testing.
Now that we have a cpu server running, we can start a terminal. We simply change the “vm config append” command and launch another VM. Note that I’ve changed service=cpu to service=terminal, and I’ve added some terminal-related parameters at the end:
minimega$ vm config append service=terminal nobootprompt=tcp maxcores=1024 fs=192.168.0.1 auth=192.168.0.1 nvram=/boot/nvram nvrlen=512 nvroff=0 acpiirq=1 user=harvey mouseport=ps2 vgasize=1024x768x24 monitor=vesa
minimega$ vm launch kvm terminal
minimega$ vm start all
Your terminal should now boot and be visible in the web interface:
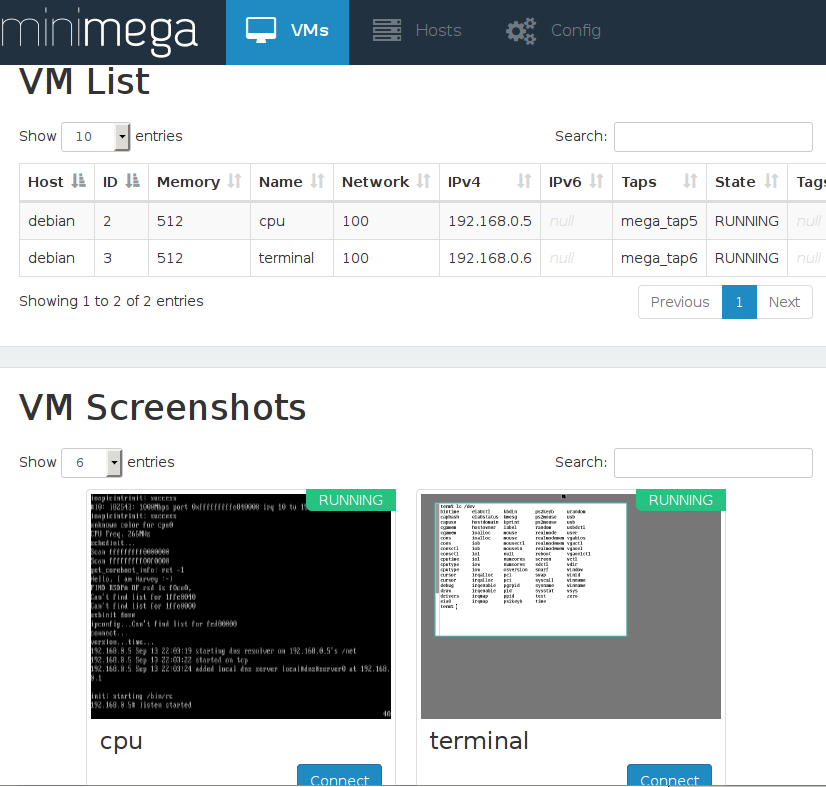
And if you click Connect, you’ll get the console of the terminal VM:

Now, as promised, if you put the following commands into a file (e.g. “harvey.mm”), you’ll be able to boot these same machines over and over:
vm config kernel /PATH/TO/HARVEY/sys/src/9/amd64/harvey.32bit
vm config net 100
vm config memory 512
vm config serial 1
vm config qemu-override add "-cpu host" "-cpu Opteron_G1"
vm config append service=cpu nobootprompt=tcp maxcores=1024 fs=192.168.0.1 auth=192.168.0.1 nvram=/boot/nvram nvrlen=512 nvroff=0 acpiirq=1
tap create 100 ip 192.168.0.1/24
dnsmasq start 192.168.0.1 192.168.0.2 192.168.0.10
web
vm launch kvm cpu
vm start all
vm config append service=terminal nobootprompt=tcp maxcores=1024 fs=192.168.0.1 auth=192.168.0.1 nvram=/boot/nvram nvrlen=512 nvroff=0 acpiirq=1 user=harvey mouseport=ps2 vgasize=1024x768x24 monitor=vesa
vm launch kvm terminal
vm start all
Simply start minimega and run this command:
minimega$ read /path/to/harvey.mm
Now, your CPU server will get a different IP each time, but changing that is outside the scope of this simple document. Type “help vm config net” and “help dnsmasq” at the minimega prompt to learn how to give VMs static MAC addresses and how to give dnsmasq a configuration file.